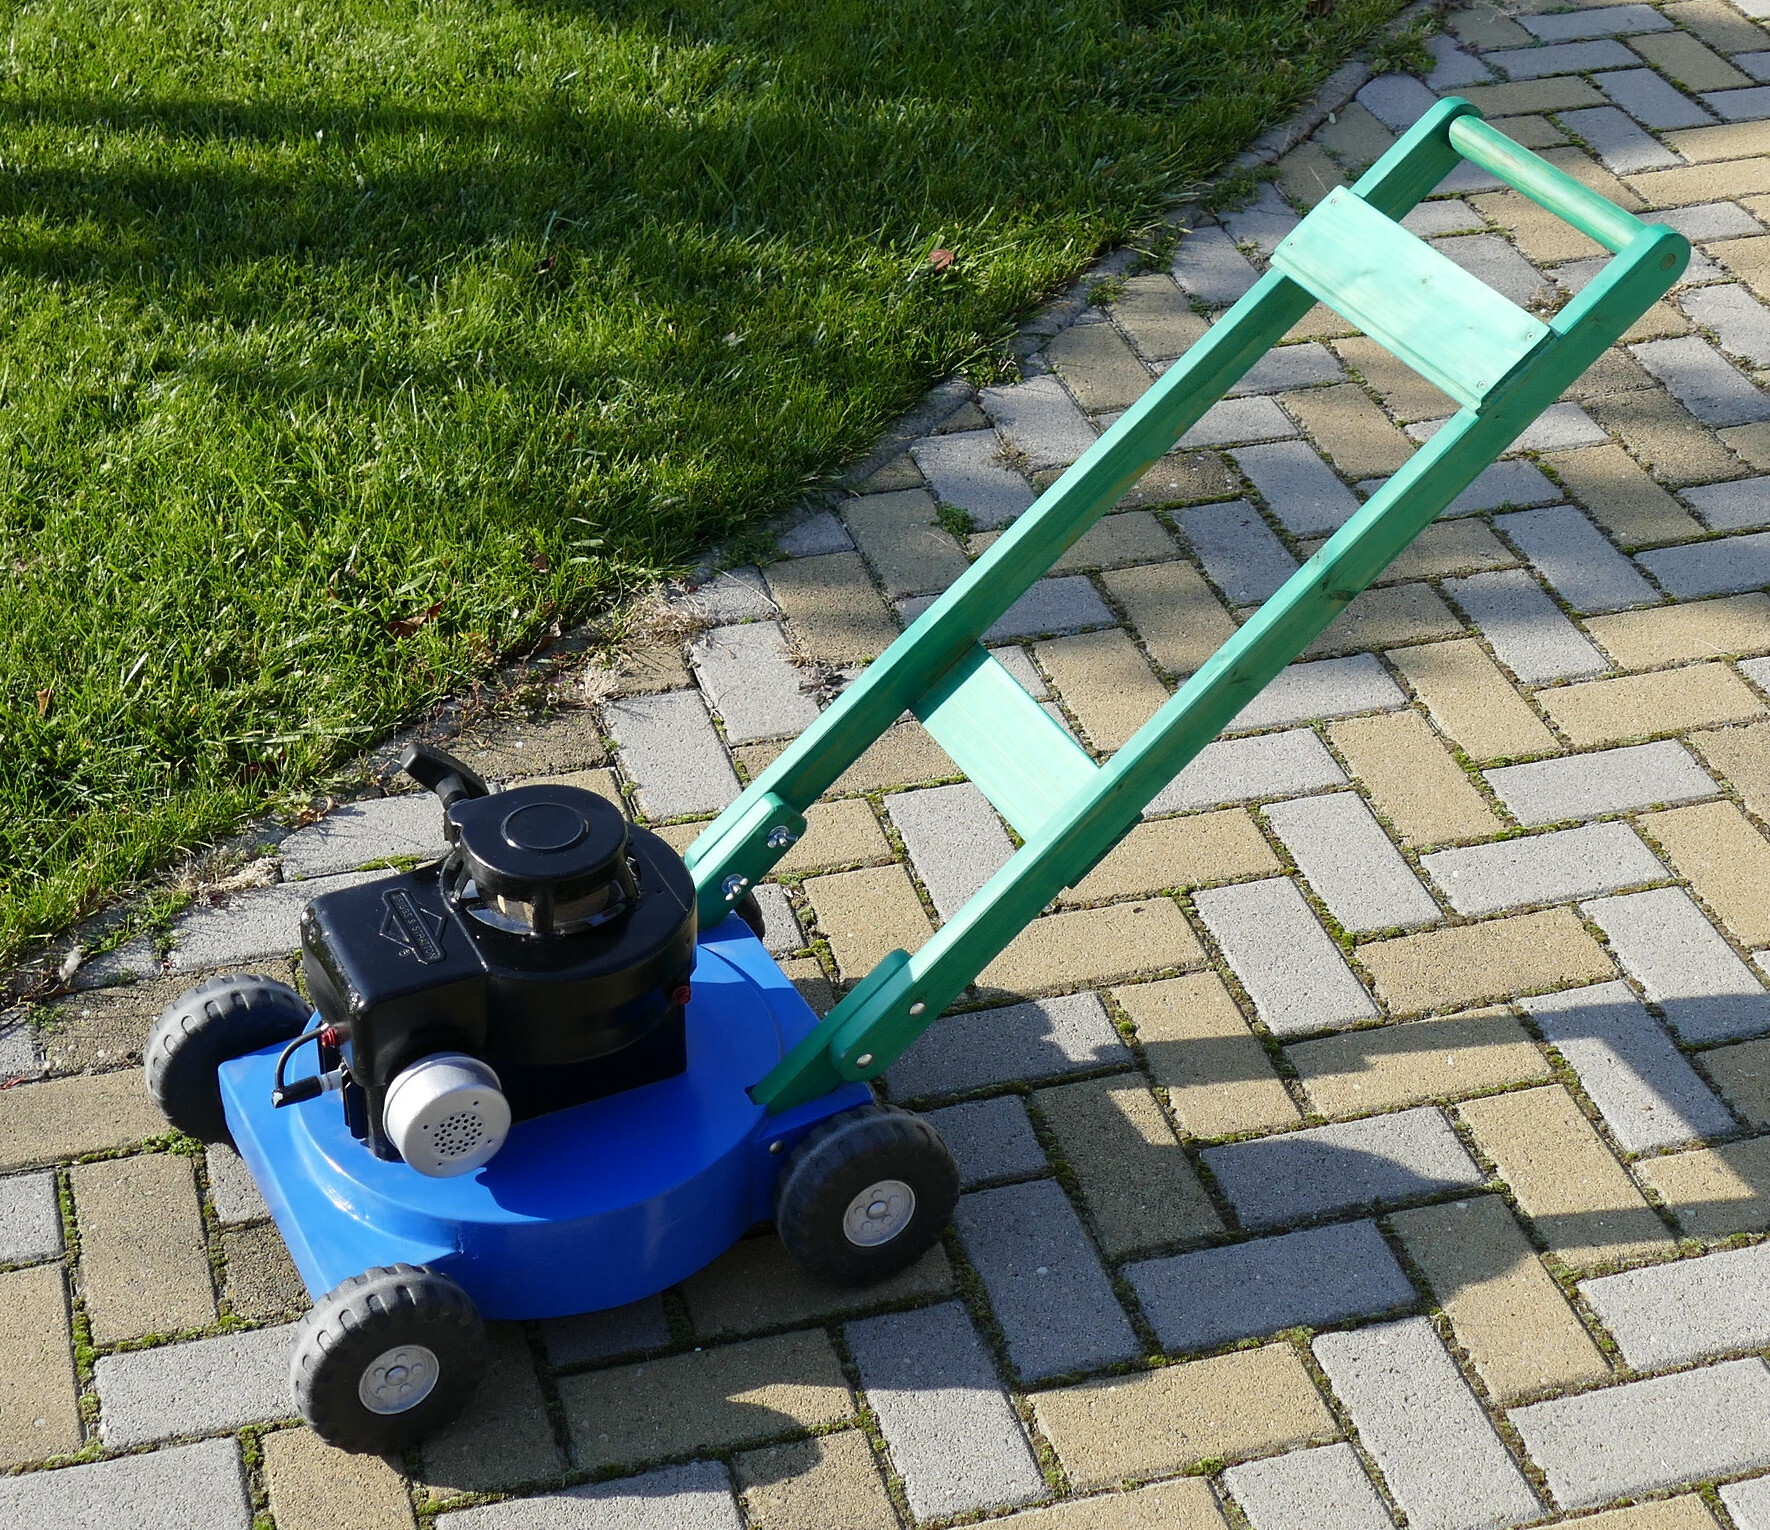
I have built this toy lawn-mower for my son (mostly) out of wood.
It started with a plastic lawn mower. It broke, then I fixed it several times, but he always complained about how useless it is. So I promised him to build a better one.
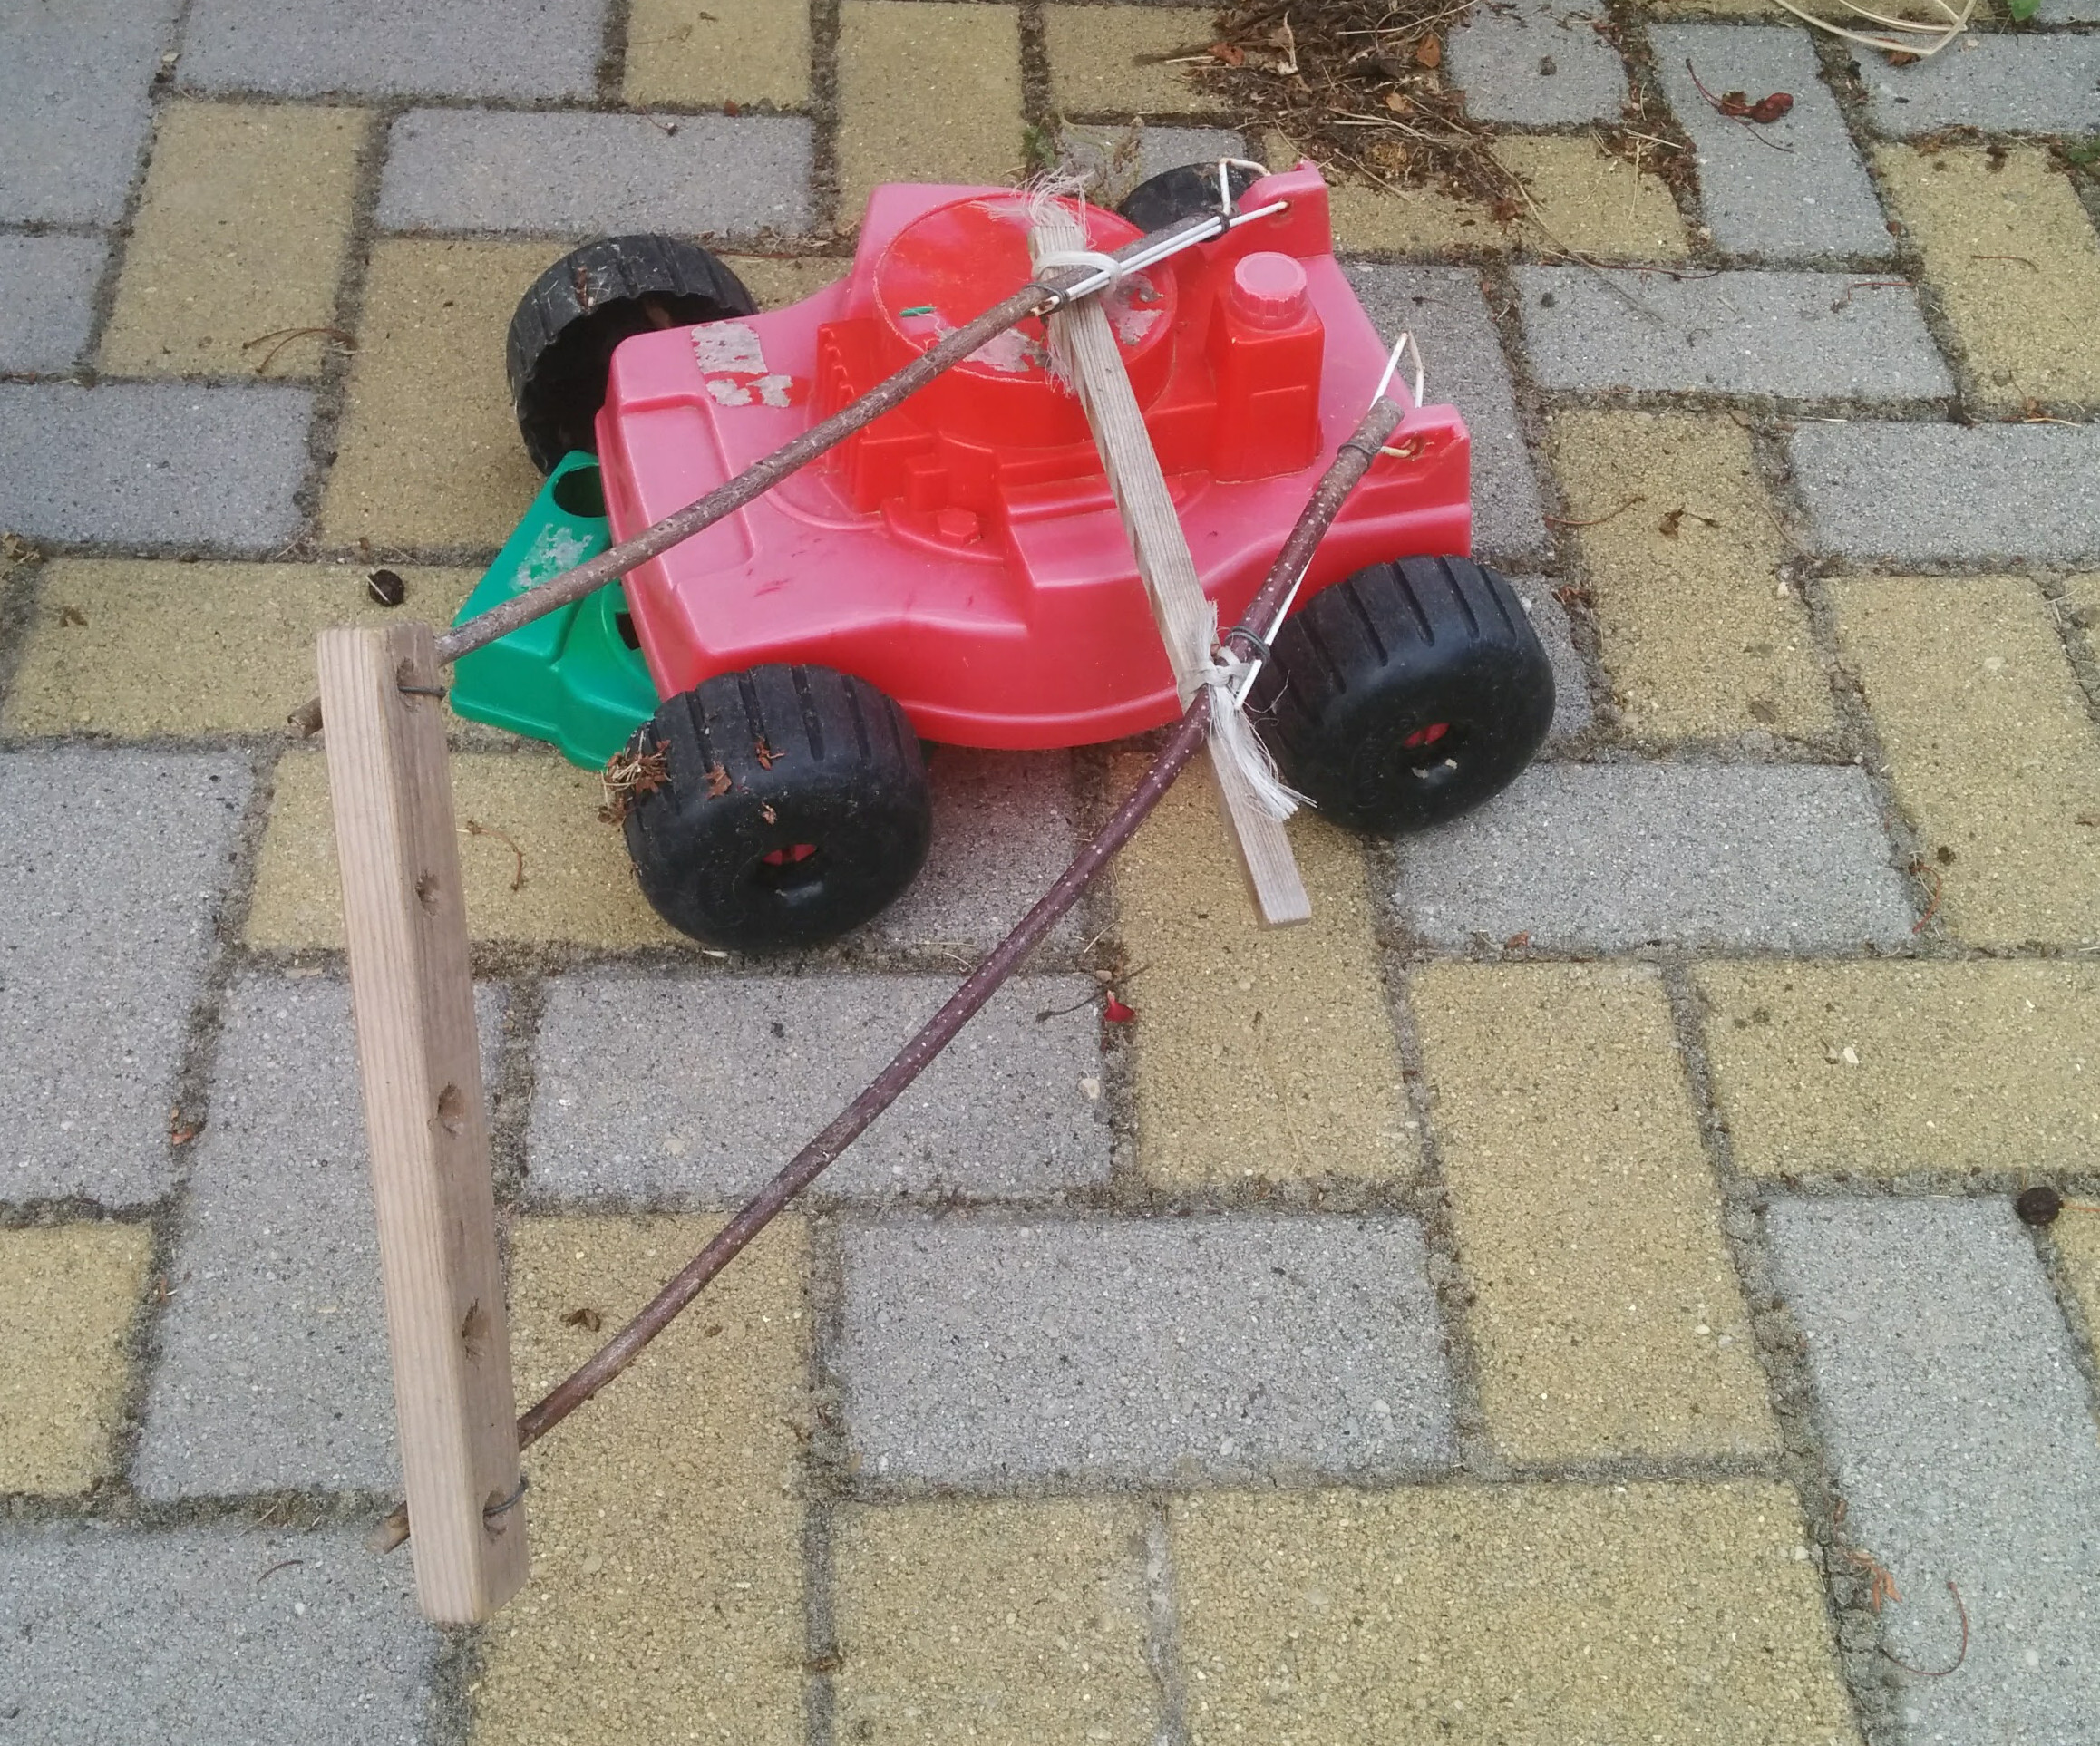
We also happen to have a junk ride-on toy, so at least I have the wheels already.
I have analyzed real lawn mowers, made a design.
Download the SketchUp plan: ToyLawnMower.skp
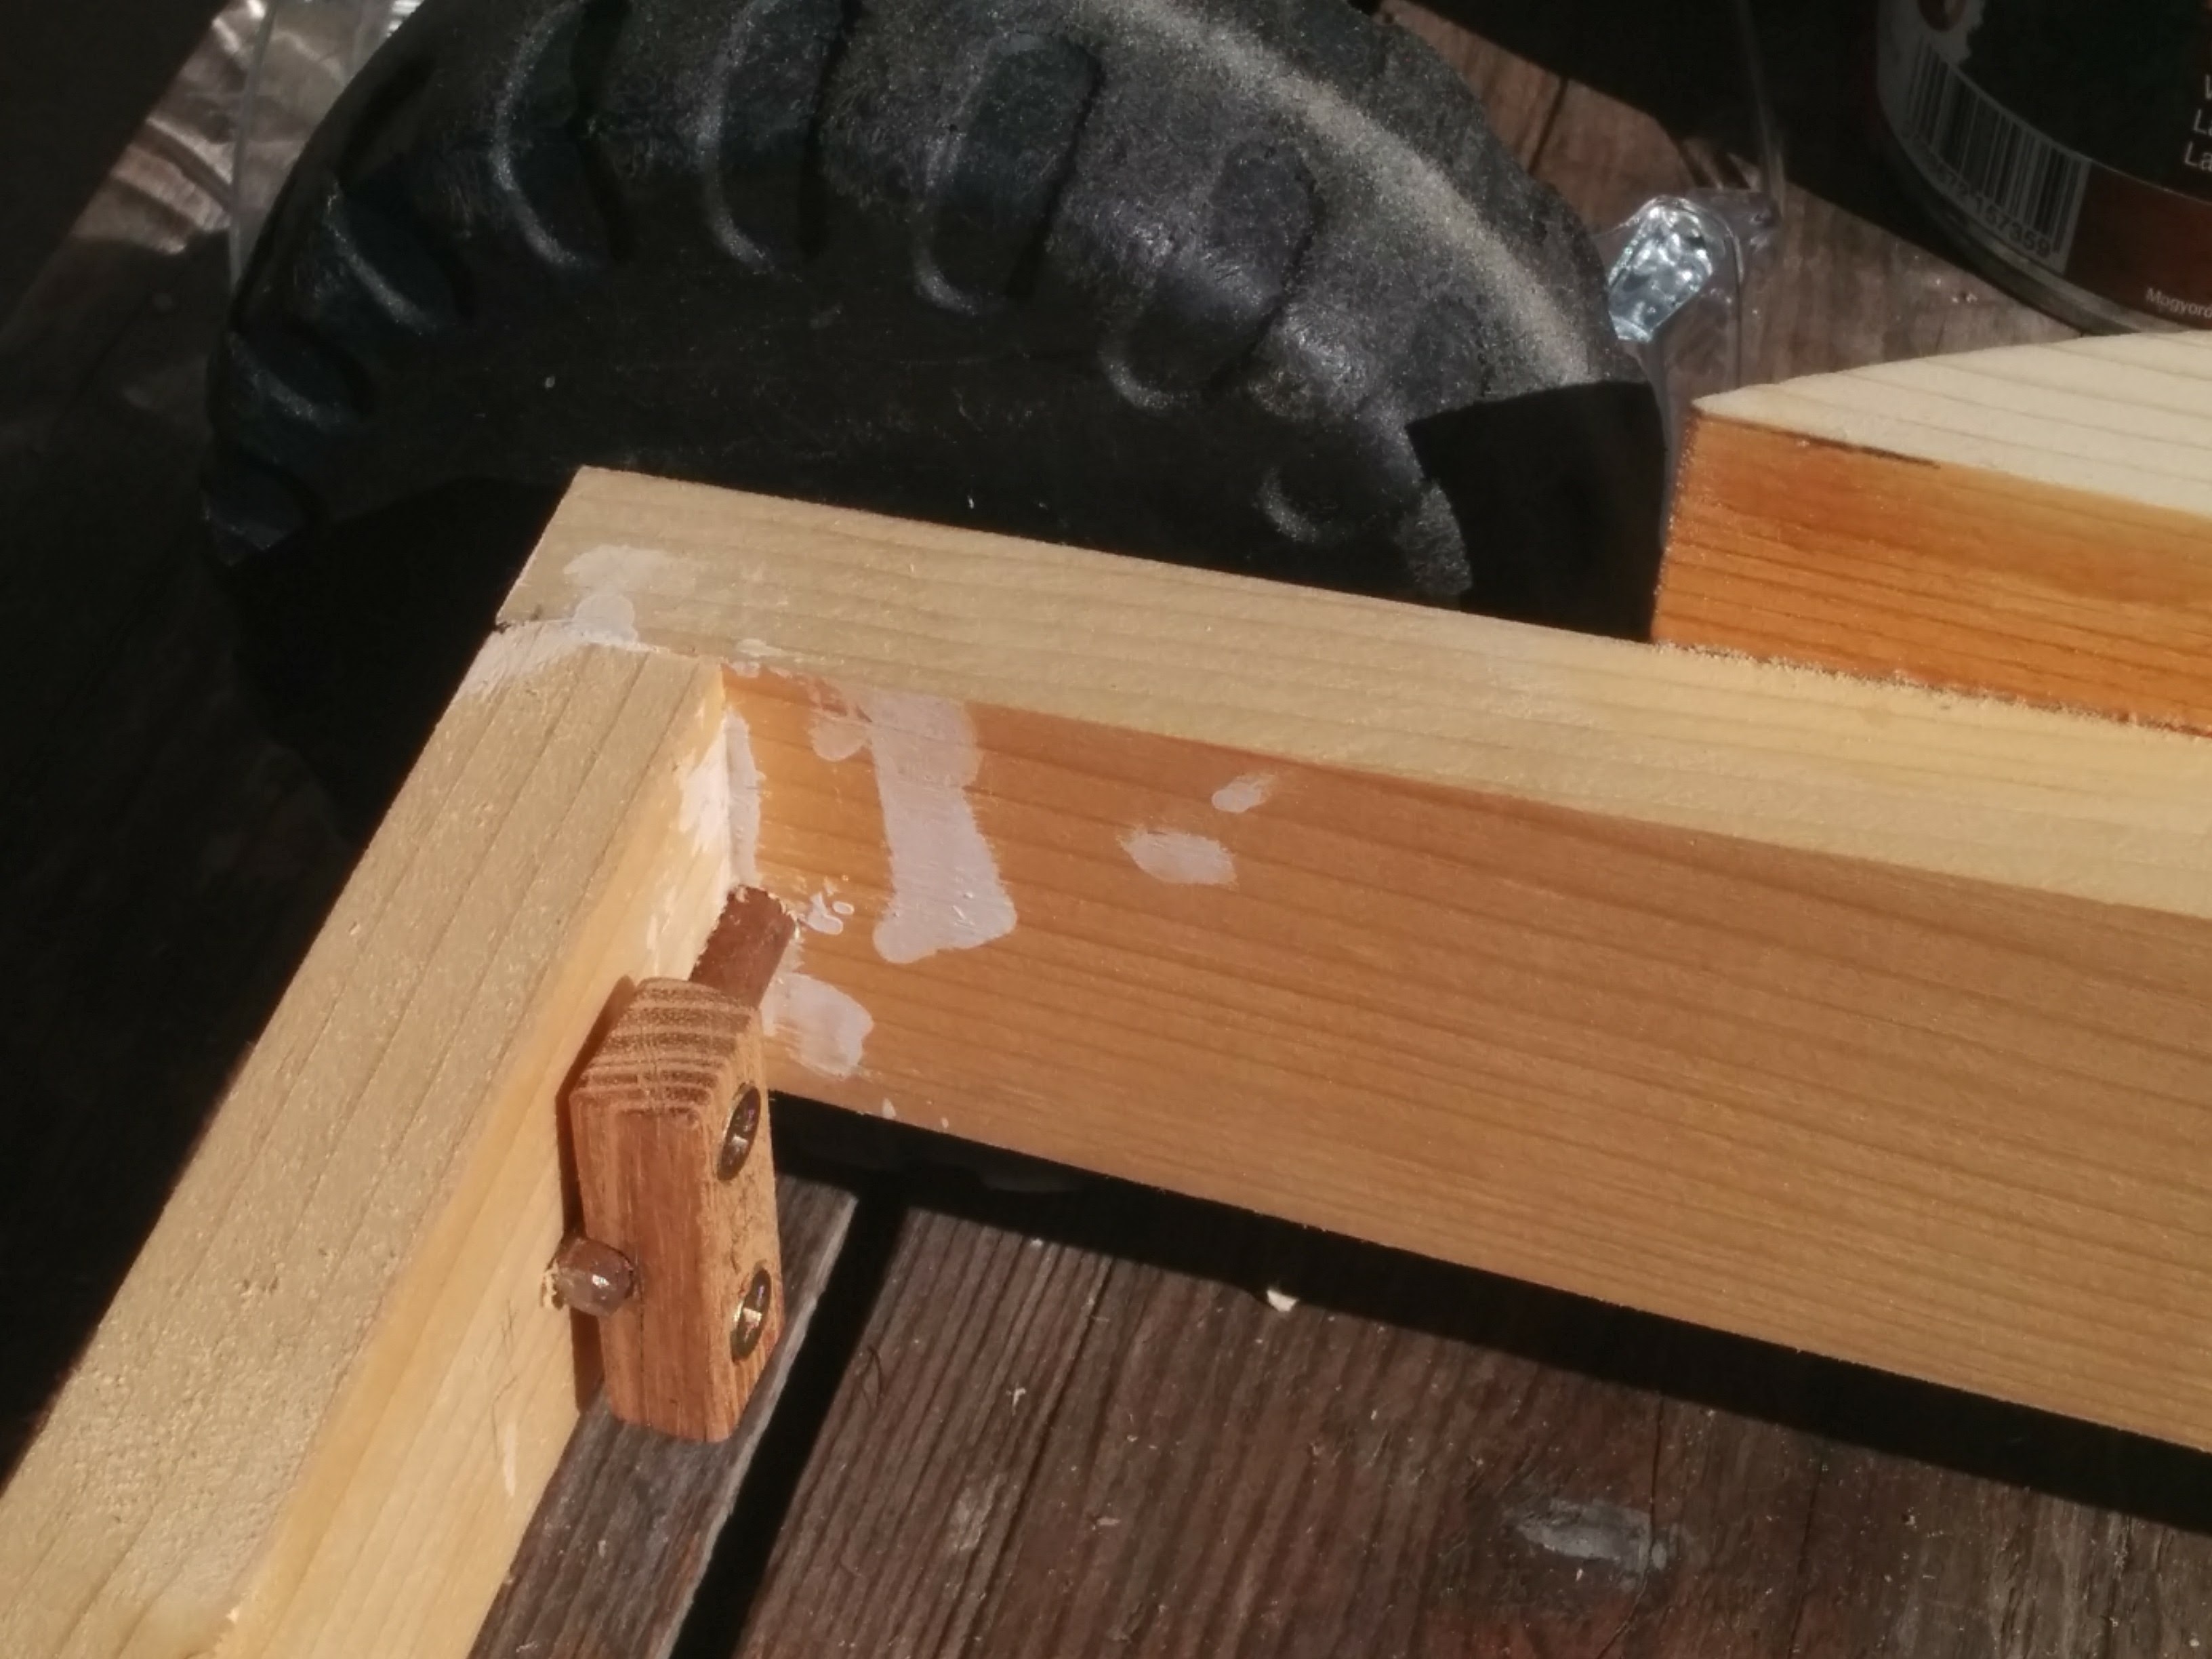
I have and started with the frame. First cut the angled side, and a matching one. The frame will be joined with dowels, so I have drilled some holes. And holes for the wheels as well.
After joining the frame the wheels were fixed by a small piece like this.
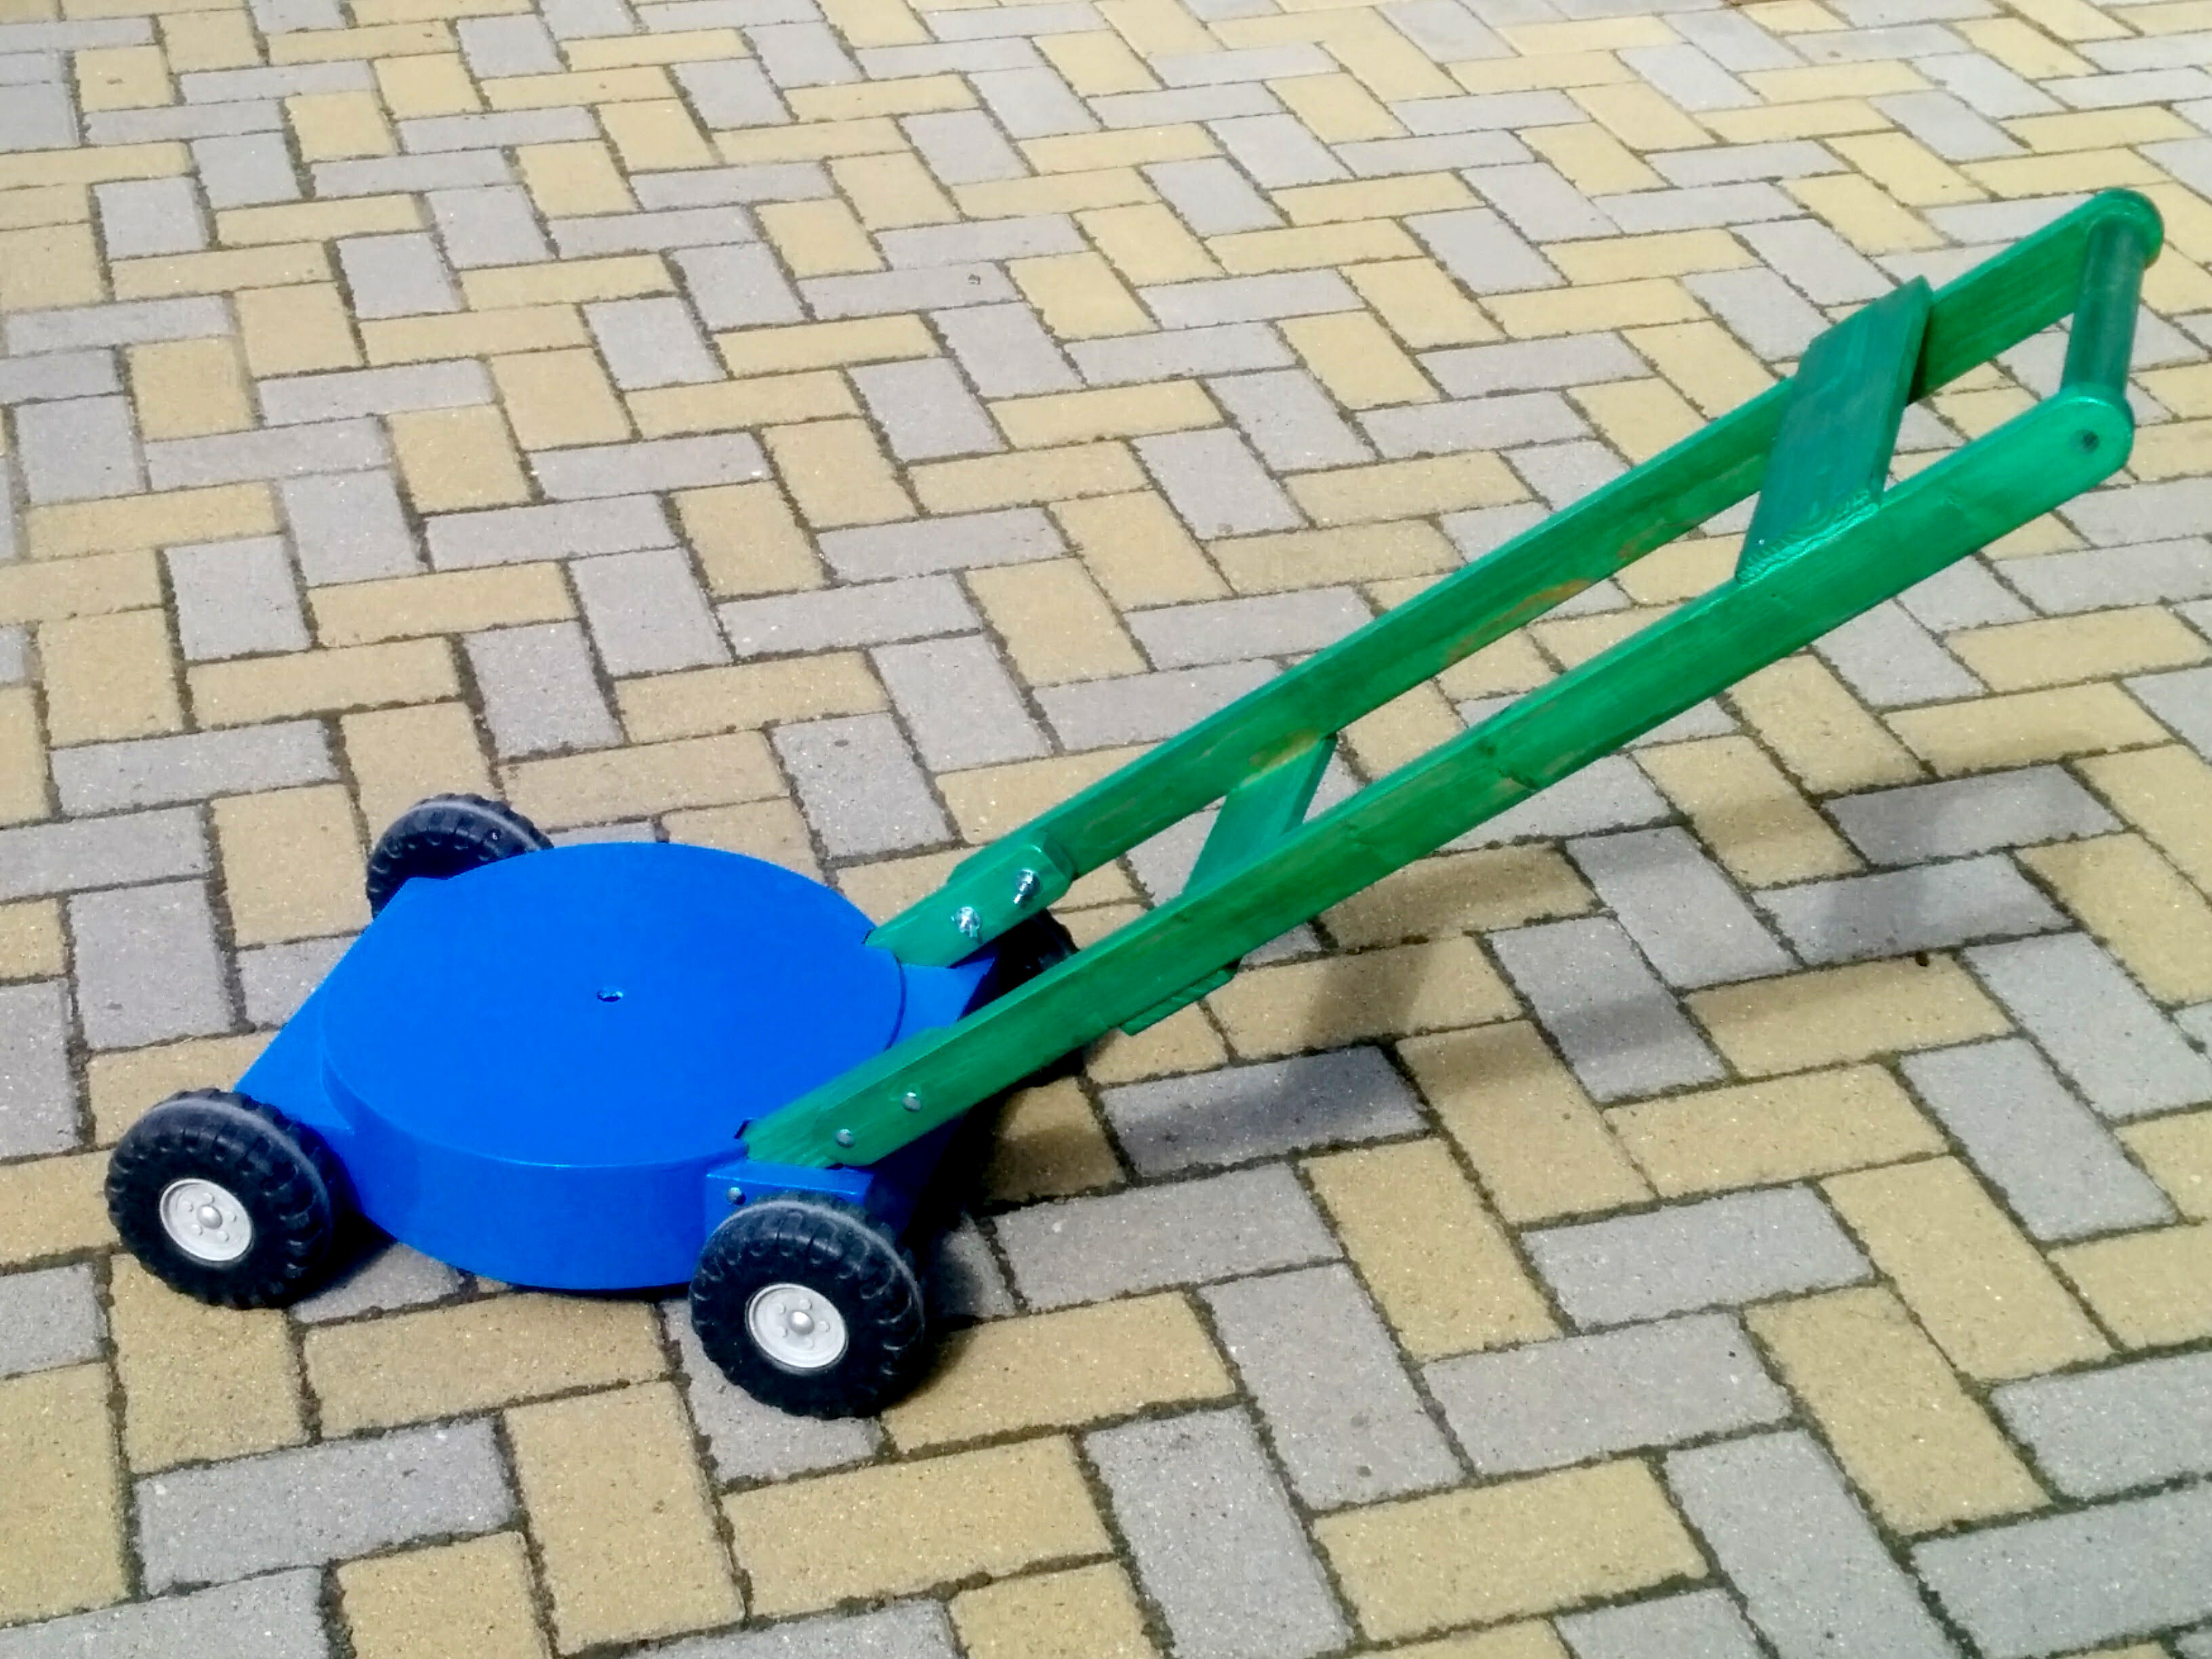
To finish the base we need some more parts. The cylinder shape is formed from two round pieces (that glued to the sides) and the cover disk, that holds the other round pieces. A board was also cut on the top of the frame.
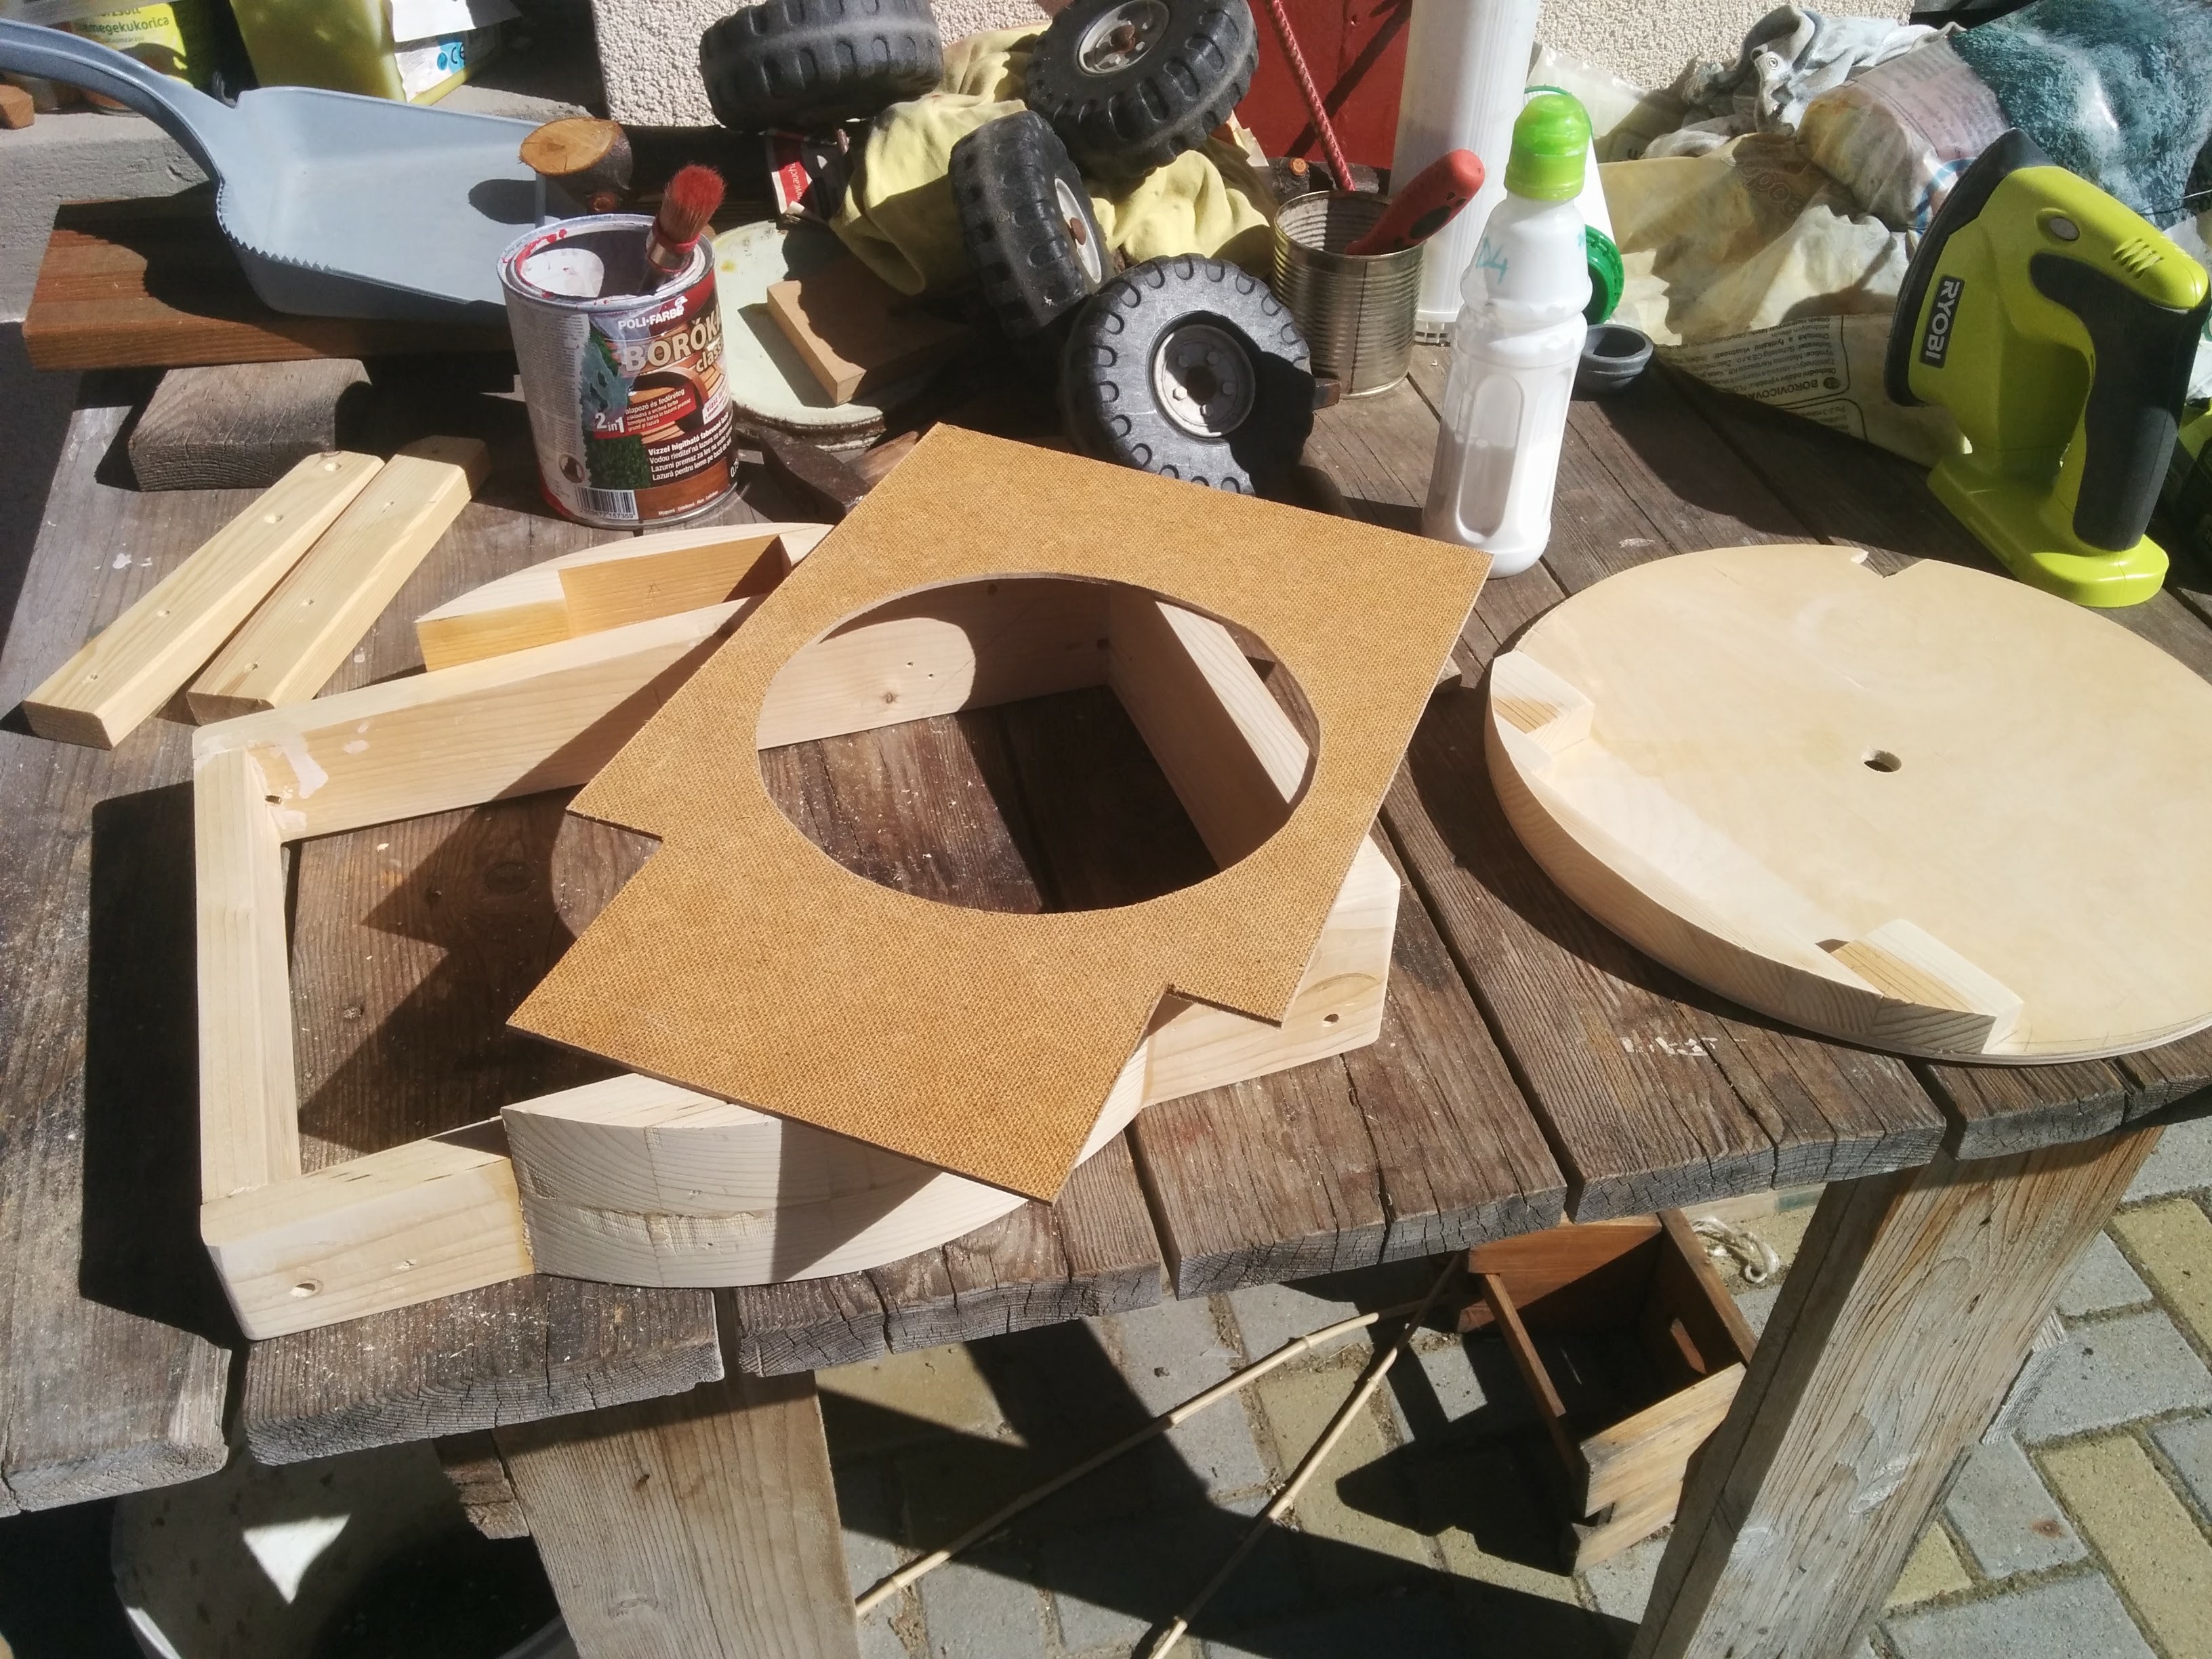
So, first the round part were formed with the band-saw from smaller pieces glued together; then the frame cover was cut; then the disk was cut from plywood. To the front some more wood pieces were glued, and cut and sanded to fit with the disk.
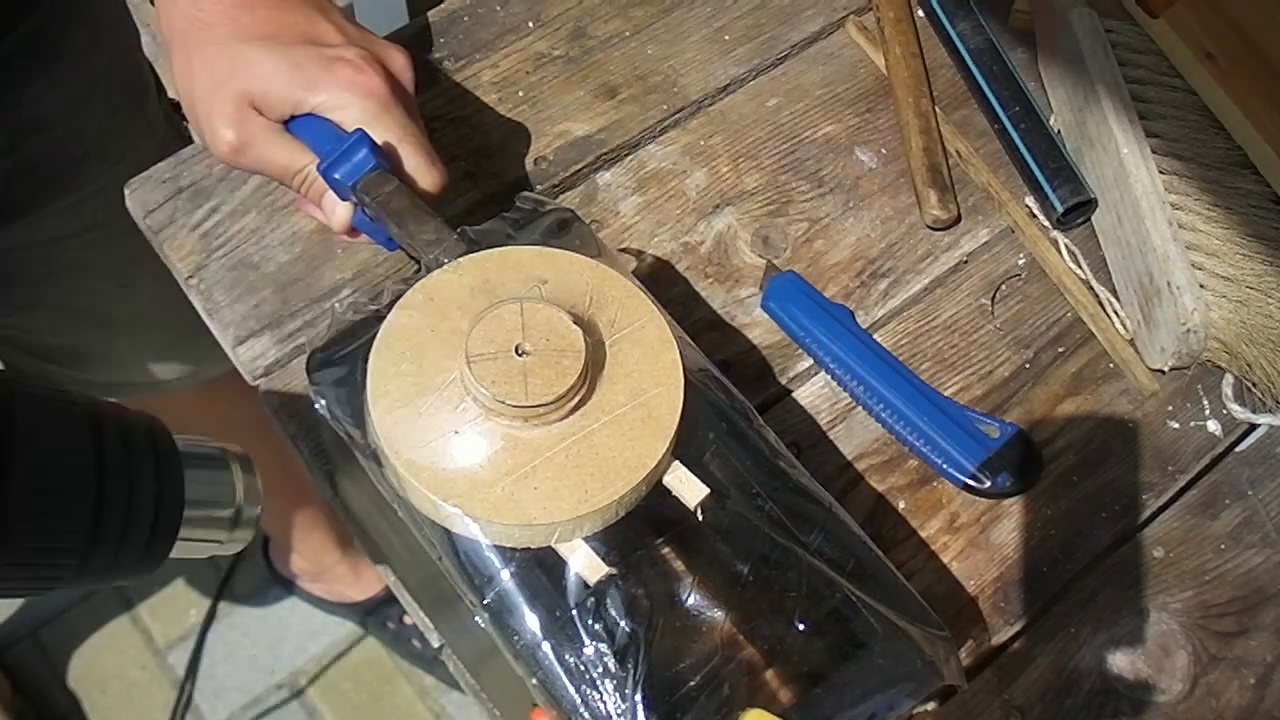
After gluing the base together, there were a lot of hollow spaces. First I filled these holes with expanding foam, then cut the foam to size, and applied acrylic paste to receive a smooth shell.

I wanted to paint it with a brush, but I realized, that I need some more professional techniques to get a nice finish.
The handle is just some long pieces, the grip-piece is joined again with dowels. With the painting of the handle I have got a helping hand.
Now the base is ready, and looking great.
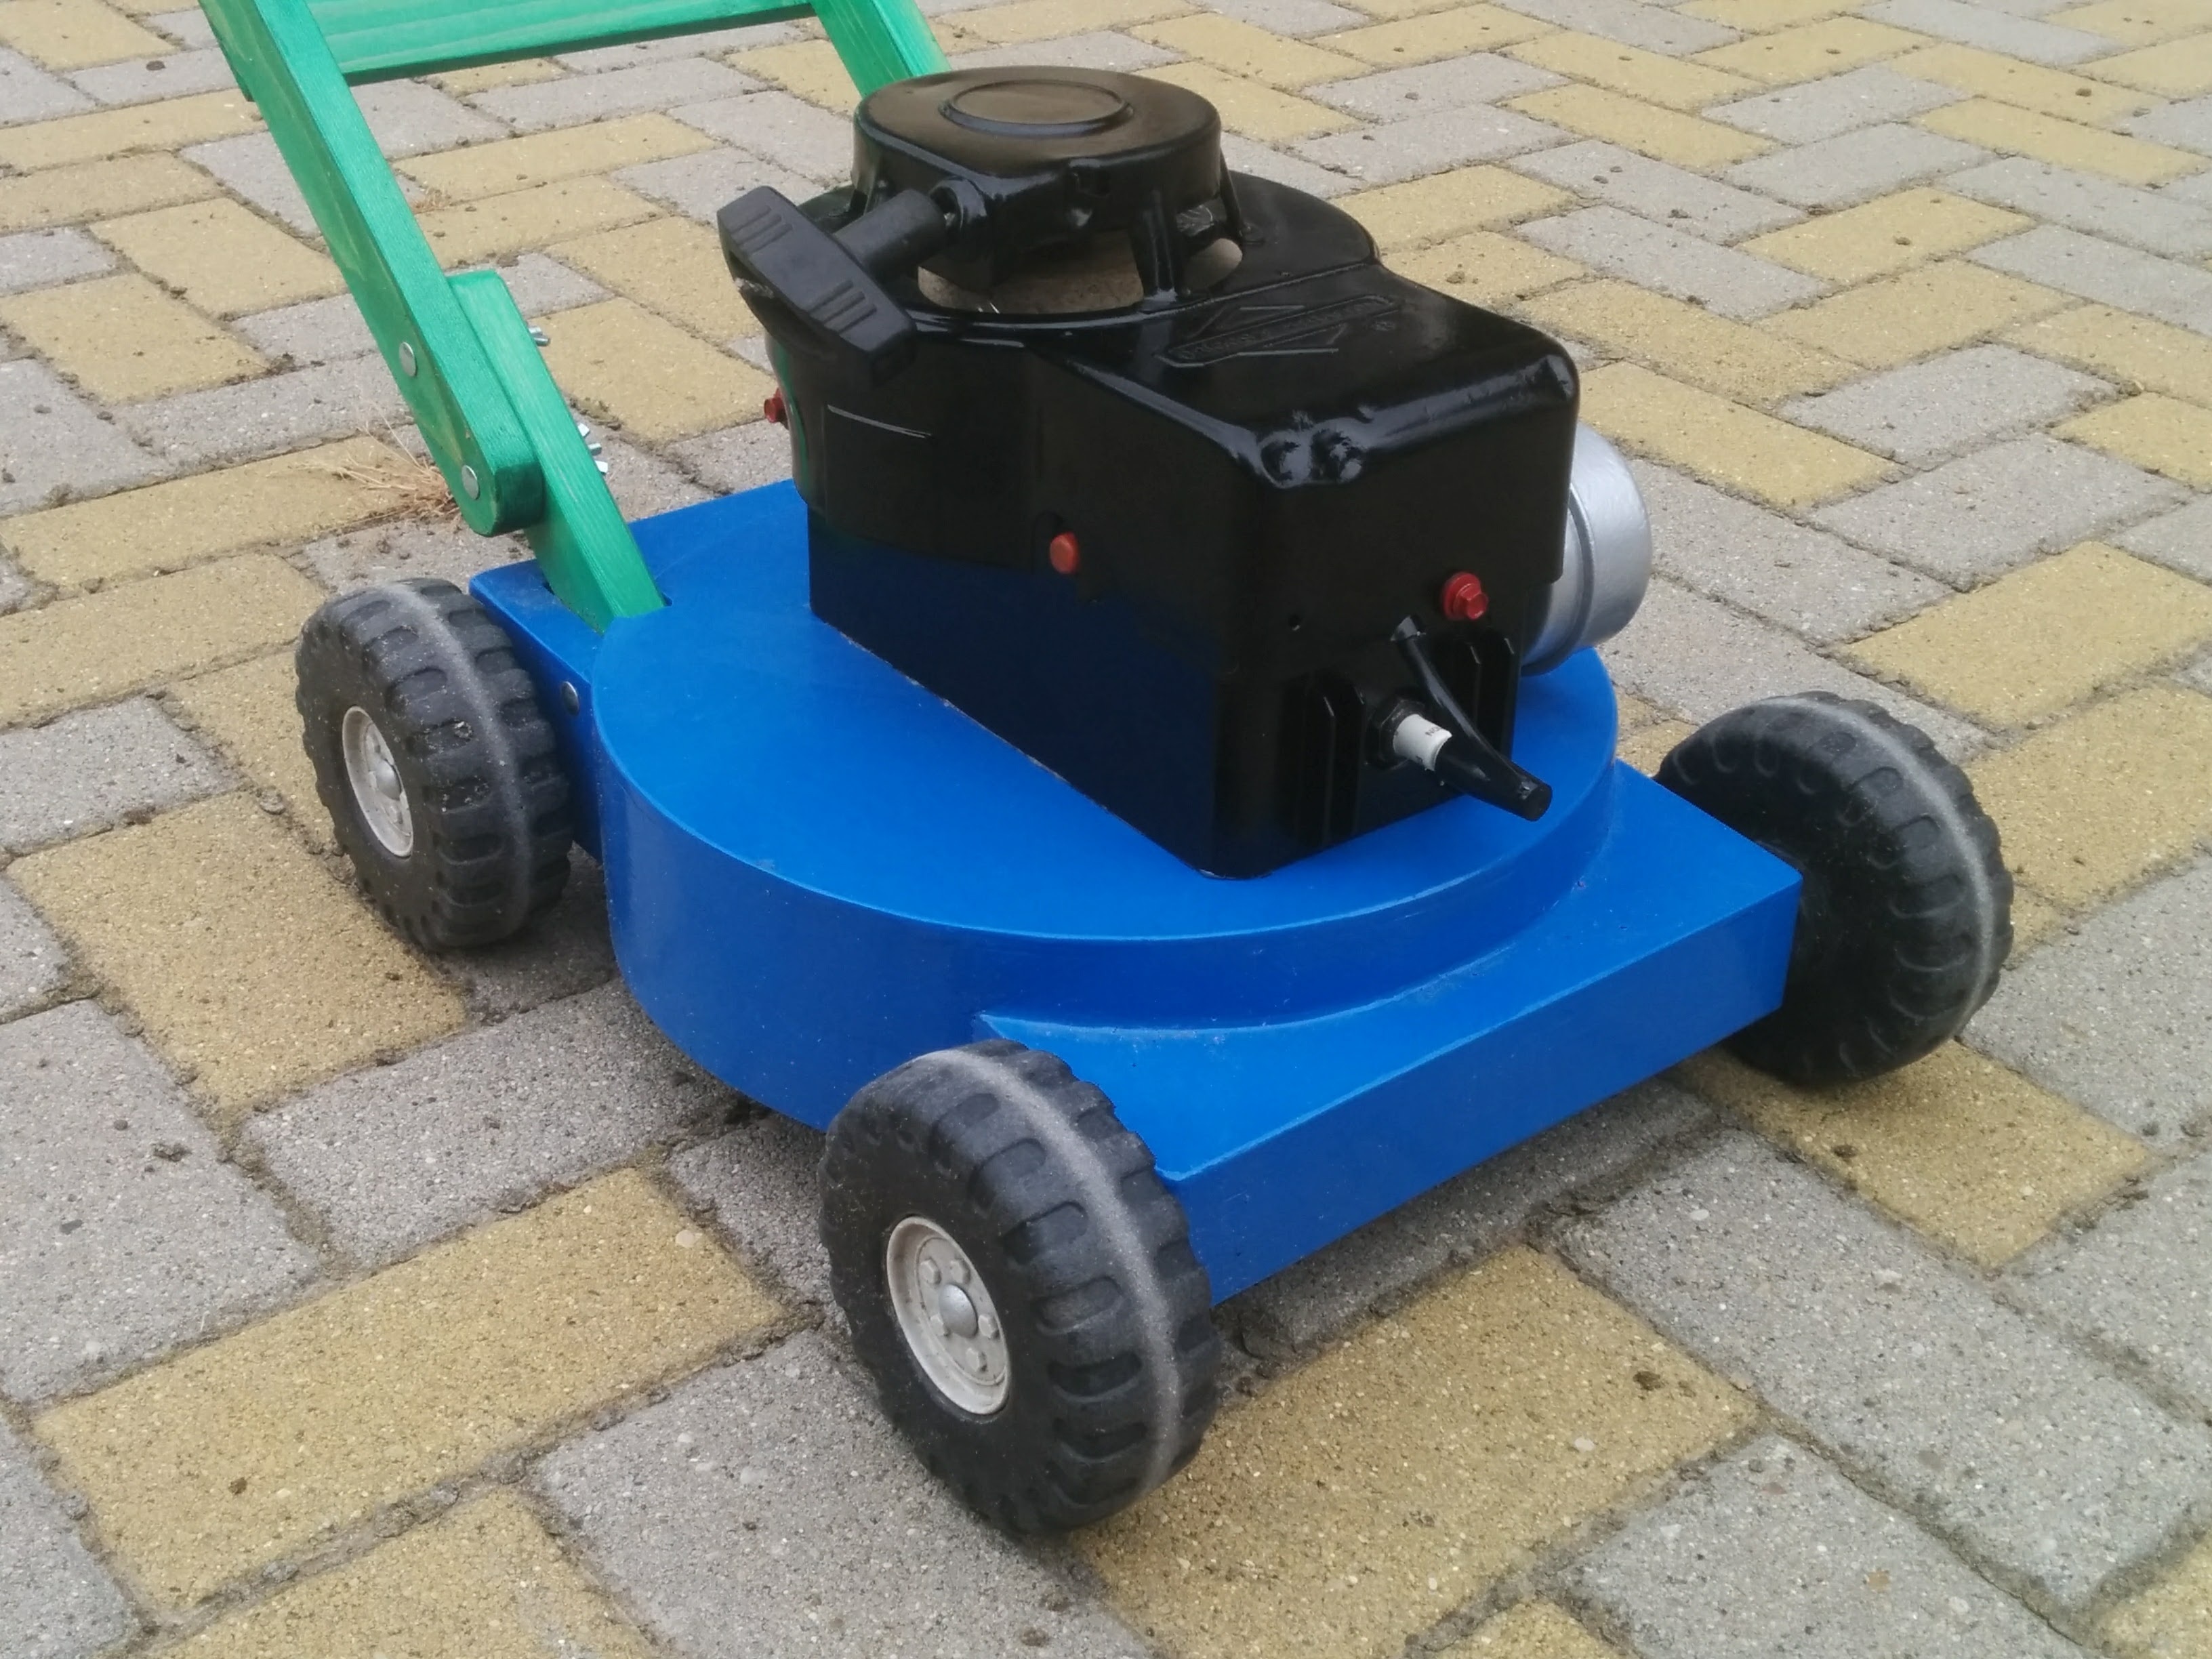
For the engine I have got an original motor cover, so all I done is to clean it, spray it with a primer, and then spray it again with black.
After that, a box was formed from wood to fit the cover. A top piece was applied to the box, that will hold the rotating shafts.
When the box was ready I have cut some slot on the front, and added some metal plates. This will form the radiator. It was covered with some coats of spray paint.
It is important to cover the motor block, to keep water out of the box, as this going to be an outdoor toy. I have cut a sheet out of a PET bottle. Here you can see that I have mounted the sheet, and some temporary cylinders. When I apply heat to the PET sheet, it will shrunk, and follow the curves of the cylinders.
A push button is added to the side of the motor; the sparking cup with the tube was forced into a hole, and the spark plug was put in place.
Next the rotating parts were added, and the cover can be mounted on it’s place.
The last thing was to add an exhaust – again salvaged from an original motor -, and the motor block can be mounted on the base.
I might want to add a gas control leaver later on.
Video: