Lego robot controller – Color recognizer
Summary
In this article we will talk about how to detect the color of objects with Arduino.
Preface
I have built lately an Arduino based driver module for my old Lego robotics kit.
At that point I have left some space on the board free, and this was intended to be so. The idea was to provide an extension port, where I can connect other modules later on. Now I have populated that extension port, so it was the time to build an extension.
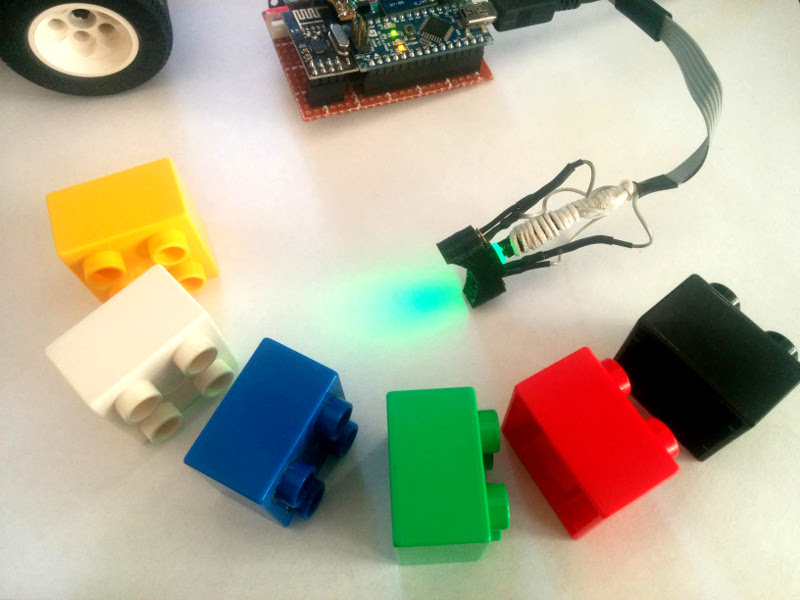
The plan is to build a photo sensor that can be used for building path tracking robots. For that I will need two sensors, to detect whether we have left the track on the left or on the right. And at this point I said: why not build it the way, so that the robot can distinguish between tracks of different colors?
Color recognition
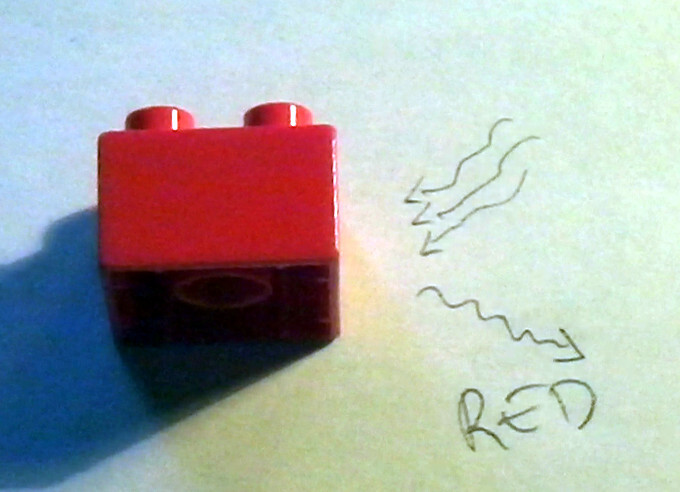
The thing we call “color”, is the property of on object what spectrum of color is it able to reflects. E.g. a red apple will reflect the frequency of the red color (and maybe unnoticeable frequencies as well), and absorbs any other colors. (The absorption will cause the apple to heat up.)
So, what we can do, is to light the object with different light frequencies, and detect how much light is reflected.
In the example above, if we illuminate the apple with a red light, we will measure some light with our light sensor. But when we use a blue light, we will barely recognize any reflection.
At least that is the theory.
To achieve this, we will use an RGB LED, turn on different colors, and detect the light level of the reflection.
Technical issues
I was facing with some technical problems while building this sensor.
Phototransistor
The first was, that I could only get hands on two identical BPX 43 photo-transistors. I would much prefer a photo-diode, that is much easier to connect. Especially as this model this three legs, and I could not find a proper documentation, how to use it with 5 Vols.
So I did some measurements, and figured out the right resistor values for me, as seen on the wiring page: Lego robot controller / Pin-outs
Other than that, the unit worked very fast. At least so fast, that after changing colors I should not wait anything with the Arduino to measure the detected value. (It responded to the change within some microseconds, while the analog read for the Arduino take some hundreds of nanoseconds.)

Please don’t use photo resistors for jobs where you want to have rapid changes!
At the end it turned out, that the two identical phototransistor has some differences in respect of calibration.
RGB LED
It turned out, that the RGB LED is not focused evenly for every colors. Thus red, green and blue appears to shine on other spots. The two sensor may detect the colors differently because of this.
The code
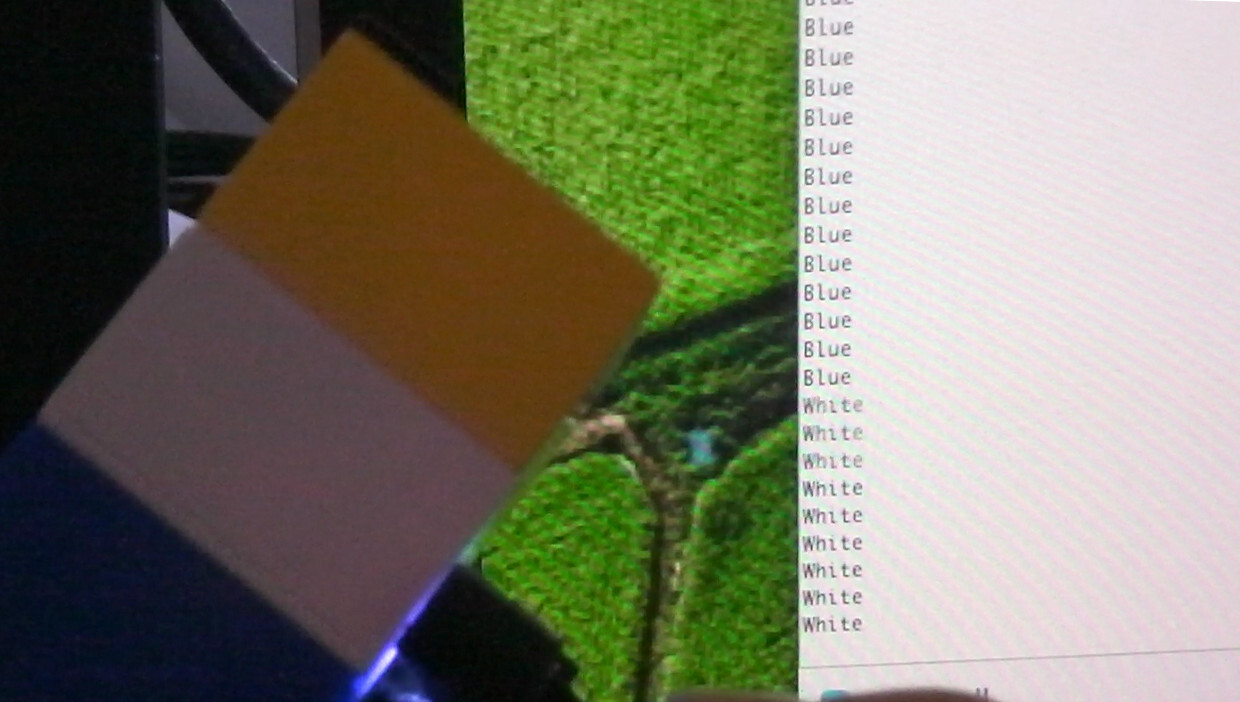
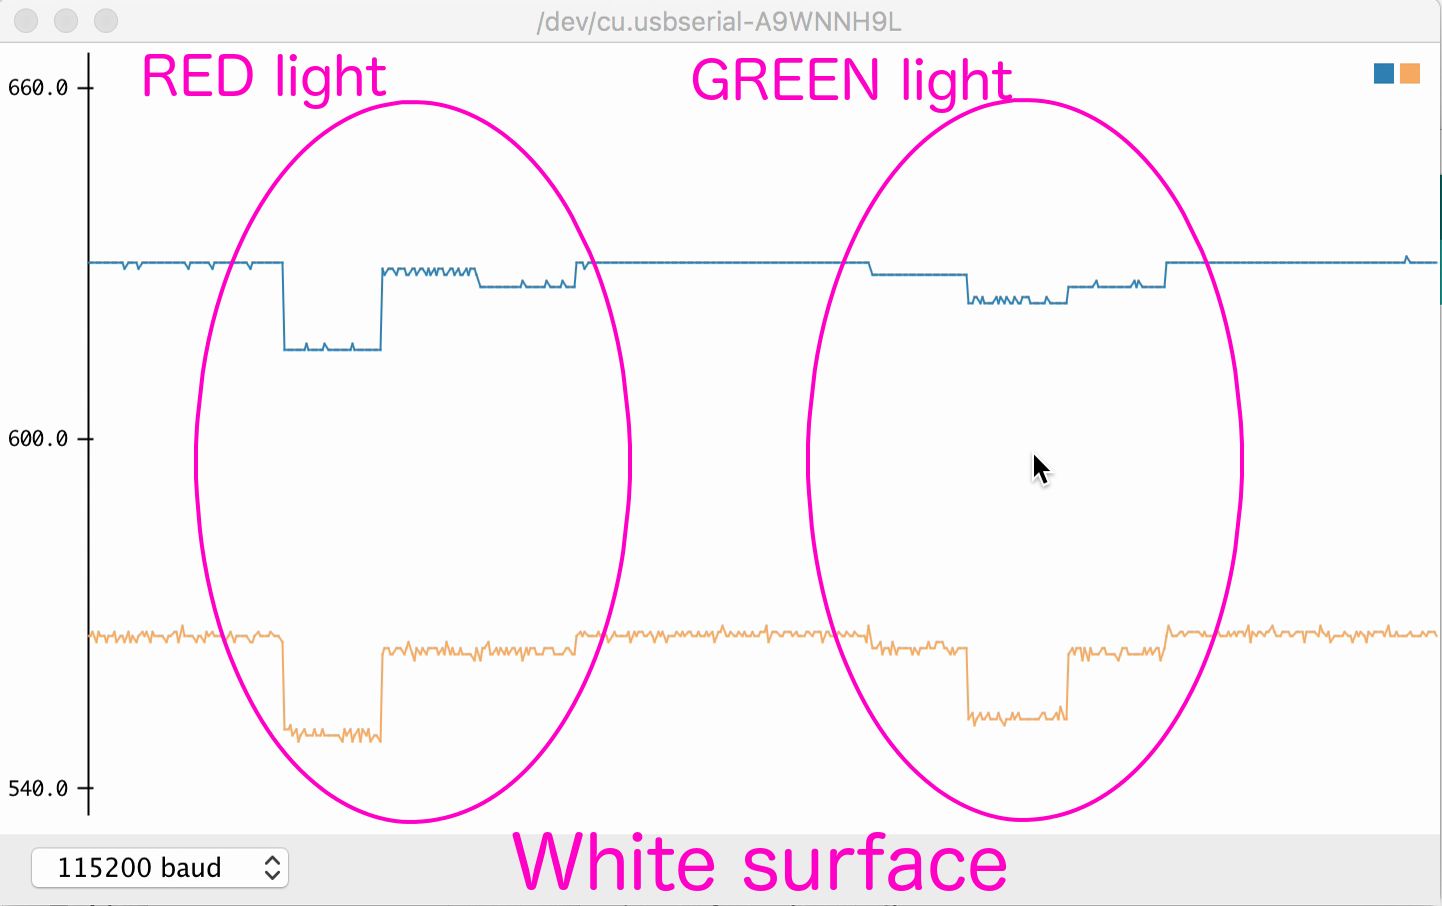
Displaying the levels
In the first code, I slowly cycle through red-green-blue lights, and measure the reflected light level. This way I can have an idea about the “black” level of the sensor, and the sensing levels of the different colors.
Sensing colors
In the second code we change the emitting colors and measure the intensity of the reflected light. In fact this measure is so quick, that out eyes see white color (as a mixture of red, green and blue) lights.