Goal
I have seen some egg painting machines out there, but I found them too complicated to be a DIY project. These are some kind of CNC laves.
In my design the pen (aka. tool) is in your hand, so the pen movement not controlled by the machine. The machine only performs the rotation task.
If you use a slow RPM (reduction geared) DC motor, you already have a tool that helps you holding and rotating the egg.
But in my implementation I have used a cheep stepper motor, so I can control the exact position of the rotation.
Building the hardware
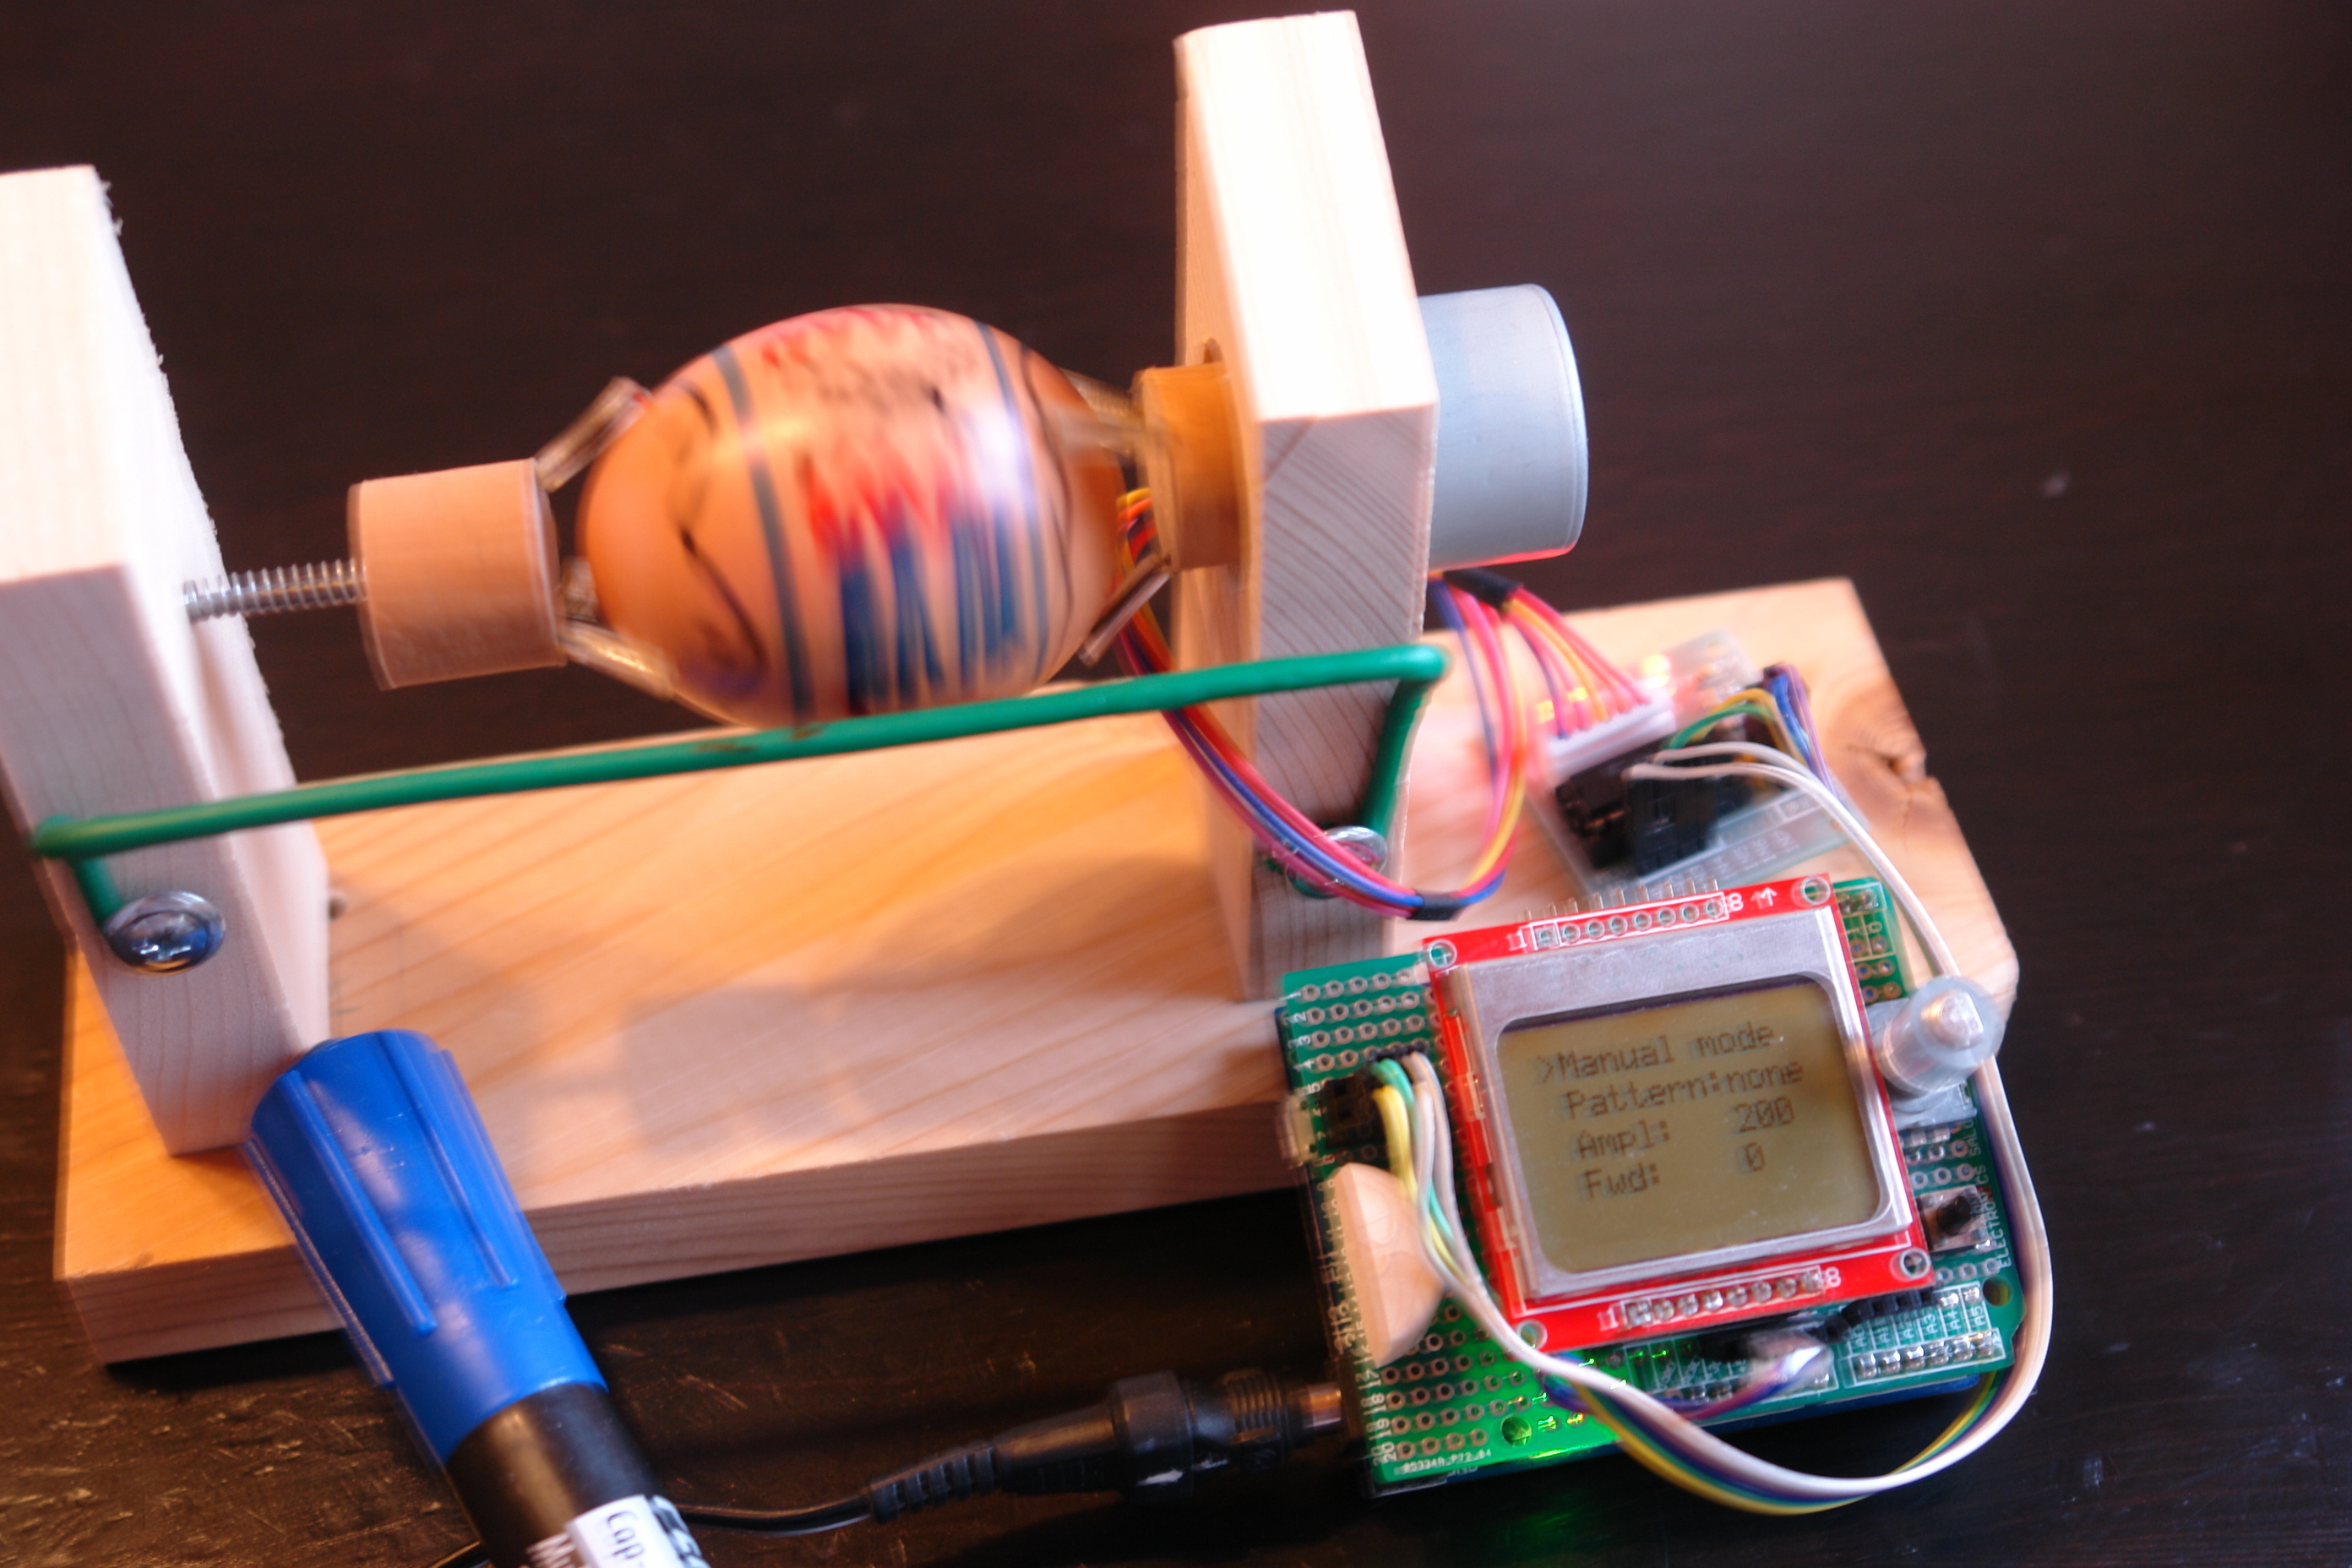
The body is built from scrap wood, it just need to be capable to hold the egg. One of the posts will hold the motor. I drill the central point for the shaft, than mark and drill the mounting points of the motor. After this, the central point was drilled out with a bigger drill-bit. On the other post, only a nail will be driven through.
We need a rod from which two small block were cut. These blocks will hold the egg. On will fit on the end of the motor shaft, the other will be used with a nail. For holding the egg we will need three legs made out of wire. So I drill three diagonal holes in them. I like to keep these broken windmills, as they contains nice springy wires. The wires are covered with thin tubes, I also have melted the end of the tubes, as they were a bit loose.
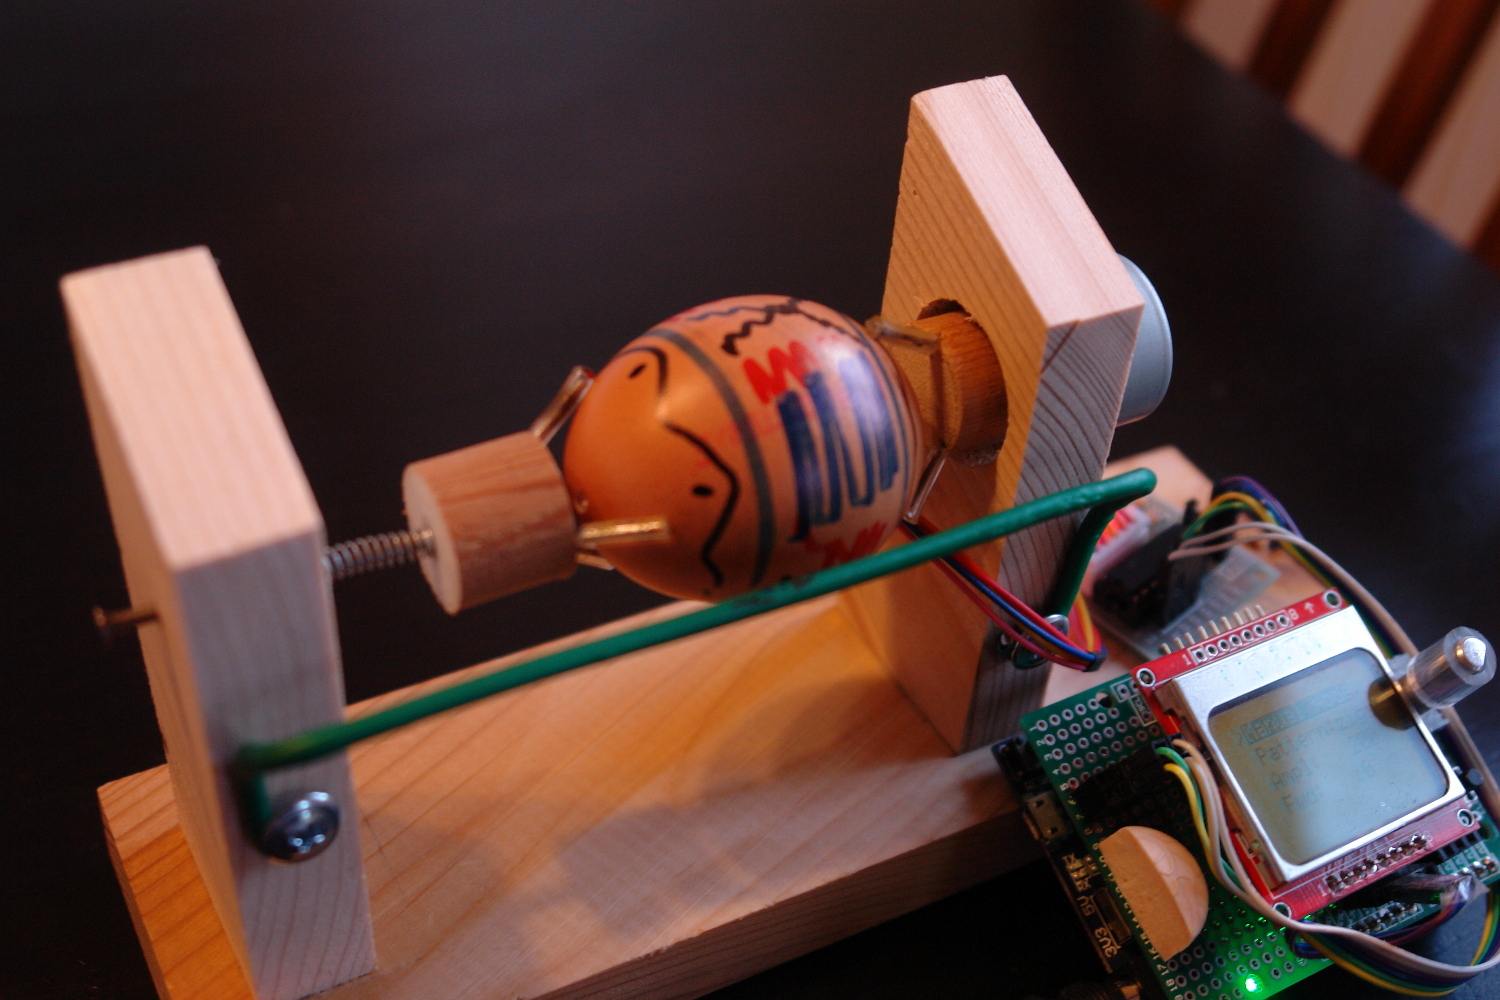
So the nail goes through the post, than comes a spring from a ball-pen, and the holding part. The spring will keep the egg tight.
On the other post the motor was mounted with the other holding part.
After fixing the post with the motor on the base, we need to find the right place for the other post.
As a final touch I have added a tool-rest from this thick aluminum wire.
Electronics
As I have mentioned I’ve used a cheap stepper motor, that comes with it’s own driver board. This is a 64 steps-per-revolution motor, and the driver connects with four wires to the Arduino.
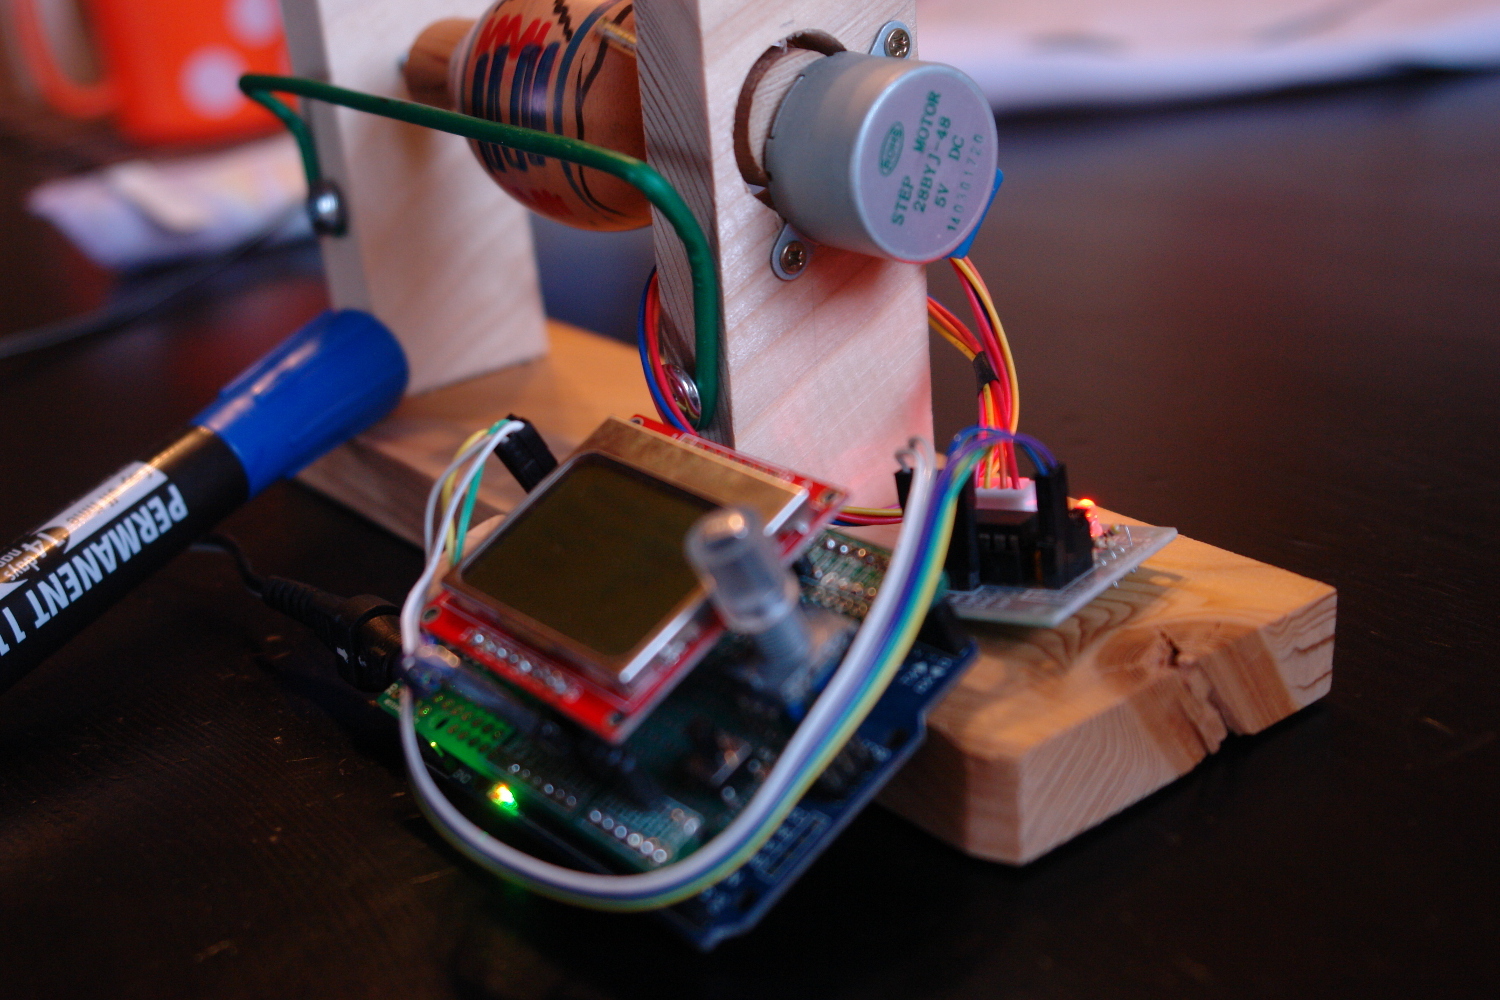
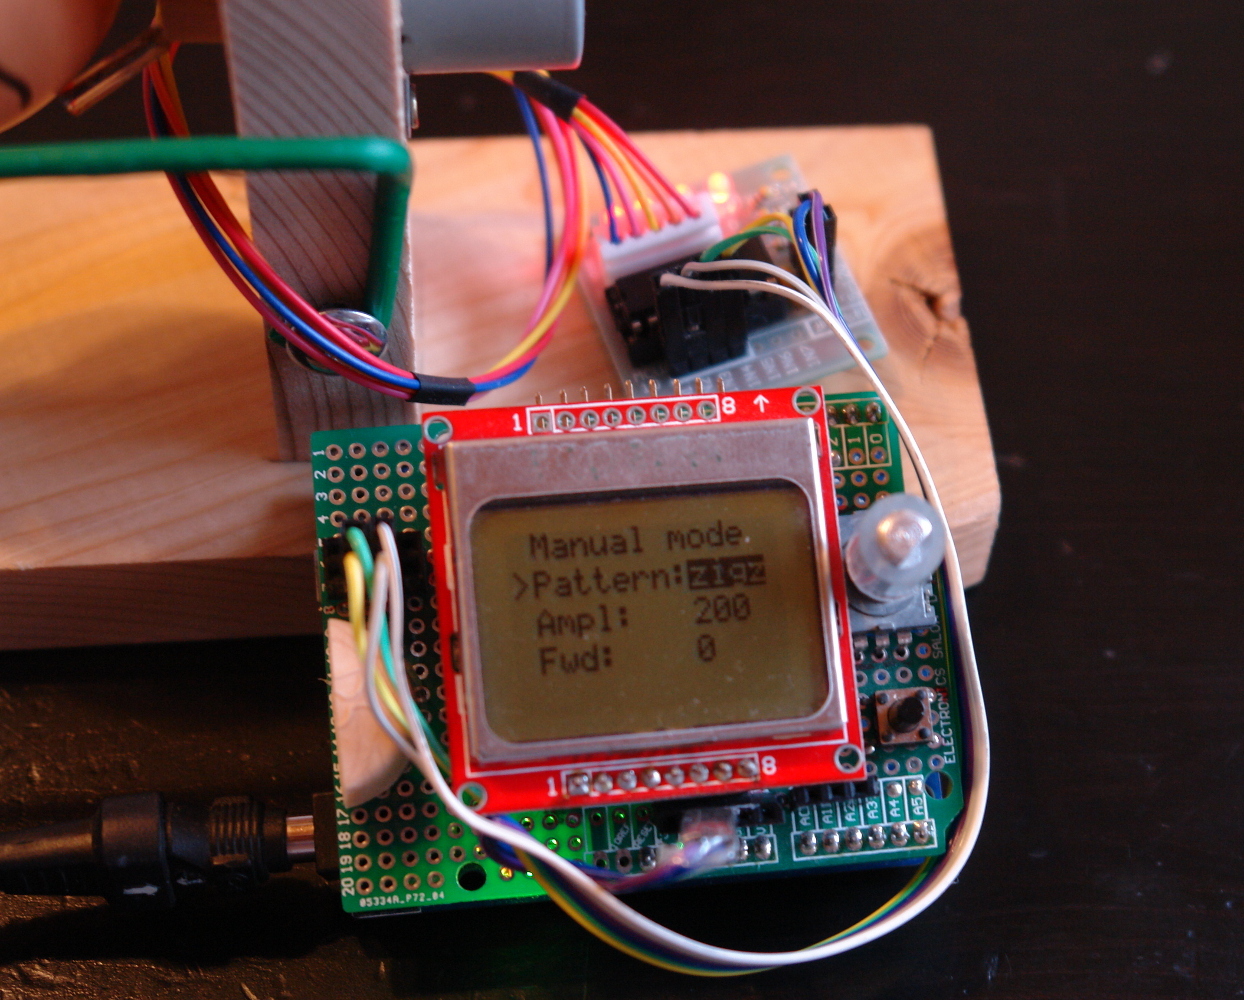
The display is a Nokia 5110 display (aka. PCD8544), a rotary switch and push button is also used. This developer board is already prepared for me, see post Rotary encoders for details.
Software features
As this is a timing sensitive application, I have used my own SoftTimer library as a framework for this software.
The following functions are implemented:
- The motor can turned on/off with the push button.
- You can navigate in the menu and change options with the rotary switch:
- manual mode – You can freely rotate the egg with the rotary switch.
- patterns – Multiply patterns can be loaded to the code, currently there are three patterns implemented. This can be extended later on with more patterns.
- amplitude – The patterns usually do back and forth type moving, amplitude is commonly used as the length of the moving.
- forward – When the pattern does some oscillating movement, the forward means that on one direction it should move further than on the opposite. This way the egg still rotates over all.
The source code can be downloaded from here: EsterEggCnc-01.zip